Add multiple tenants to properties with ease
In this blog we’ve decided to explain just how easy it is to perform inventory reports against student and HMO properties – helping you get less busy!
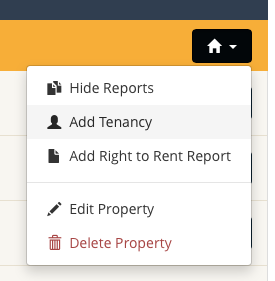
First off, you DON’T have to do a new report every time. Thanks to our intuitive cloud-based software, you can setup a master inventory and then add tenancies against it – thus copying all your descriptions and photos, whilst also allowing you delete rooms that aren’t relevant to individual tenants. See below screenshot:
There’s a few important points to note when setting up your master inventory:
Step 1
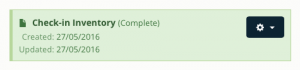
Make sure your first inventory is ‘complete’ on the entire property before adding new tenancies (it will show in green – as per the screenshot below). It’s easy to do this, when asked if you wish to send out an email for electronic approval (this is one of the last questions you’ll be asked) – just say ‘No’. Then it will create the report for you, making it instantly available for download. There will be a dashboard status showing ‘complete’ in green. Effectively this creates a ‘master inventory’. Meaning new reports will automatically copy the descriptions and photos through from.
Step 2
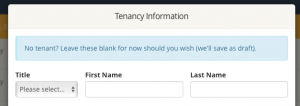
After you have setup an inventory against the entire property – it’s really important to then add tenancies based on the number of rooms you will eventually let (even if you haven’t found the tenants yet). You can do this by simply choosing ‘Add Tenancy’ – it will let you leave the details blank for now too, meaning you can add their details later. By doing this, it will copy all the pictures and descriptions from your master inventory straight away (you don’t have to do anything – this will happen automatically).
Step 3
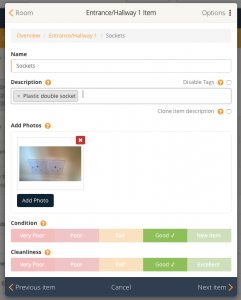
It’s important to note that the photos are date stamped automatically from the day they were taken. It’s therefore important that any new reports are created reasonably quickly – otherwise if the pictures were taken months before the tenant moves-in, it could cause a problem if ever there is a dispute. Don’t worry though, you can simply replace the pictures with update ones if you wish. Simply delete the old picture, by clicking the red ‘X’ in the corner and then ‘Add Photo’. This way, you keep your item descriptions and the photo is up-to-date.
You can always contact the support team if you have any further questions and we’ll talk you through what you need to do. Also, don’t forget that once you’ve carried out an inventory on a property, the rooms and item descriptions will be remembered for the next time. Saving you time and money! Look out for new blogs and information on development – we’re very busy bees and there’s plenty more great new features on the way soon.